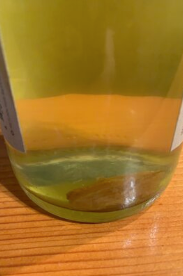
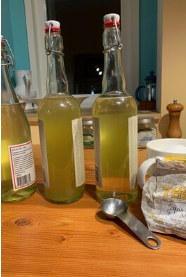
How to make your own kombucha.
Doing your own Kombucha is a very easy process.
Doing your own Kombucha is very easy even though it’s more or less a 3 weeks process before you can taste the magical drink.
WARNING !
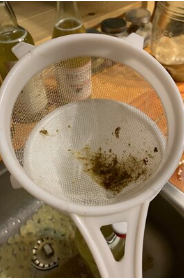
Be careful – if you didn’t use a strainer (you’ll understand later in the recipe), small parts of the scoby will go in the bottles making the fermentation process going and increasing the pressure.
I had once a glass bottle exploded and cut in half (thankfully nobody was near the bottle when it happened) and another time while I opened a bottle to serve the magical drink, the pressure made the liquid gushed out of the bottle and land on one of the kitchen wall… not the best approach when you have friends over…
Ingrédients.
What you need – for 3 1/2 l of water.
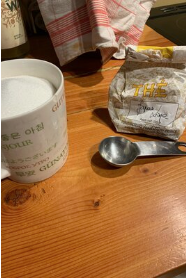
4 green or black tea bags or table spoons. You can go for the traditional cheap tea bags, I discovered not long ago that using tea that you really like will provide another level of taste. Possibilities are endless as to what type of tea you choose.
1 big cup of white sugar.
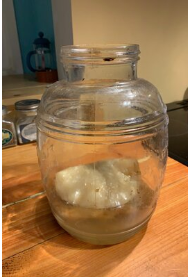
a kombucha scoby (the mother). Ask around your friends if somebody would be willing to give you one. With time the scoby multiple itself and you have to throw some away.
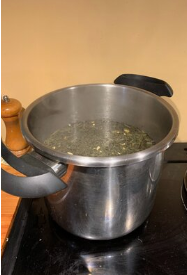
a big pot to boil water to make tea.
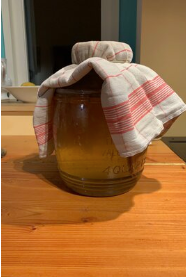
a big glass jar. You need to remove the lid and put a tea towel in order for the kombucha to breath.
a funnel made of plastic.
a strainer made of plastic.
bottles made of glass with a very strong system to attached the lid. Can be recycled kombucha bottles, cider bottles. As the kombucha is poured in the bottle, the fermentation process keeps going and if it’s not strongly closed, the lid will pop up due to the gaz pressure.
Recipe.
in a big jar, boil 3.5 l of water.
pour the sugar, stir to dissolve the sugar.
make the tea.
set aside to wait for the tea to be at room temperature.
in the big glass jar, put the scoby.
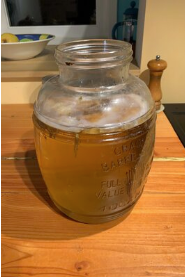
when the tea is at room temperature, pour it in the jar close the jar with the tea towel, I use an elastic to make sure it’s well attached.
set in a place with no light for 2 weeks.
Il est très facile de faire son propre kombucha.
Il est très facile de faire son propre kombucha, mais il faut compter 3 semaines avant de pouvoir boire le breuvage magique.
ATTENTION !
Attention – si vous n’utilisez pas une passoire (vous comprendrez plus tard dans la recette), des petits morceaux de la mère (le scoby) iront dans les bouteilles, continuant ainsi le processus de fermentation et augmentant la pression.
A mes débuts, une bouteille en verre a littéralement explosé, se cassant en deux (personne ne se trouvait heureusement à proximité quand cela s’est passé) et une autre fois, alors que j’ouvrais une bouteille pour servir la potion magique, la pression a fait jaillir le liquide et repeint une bonne partie du mur de la cuisine… pas la meilleure approche quand vous avez des invités…
Ingredients
Ce que vous avez besoin – pour 3.5 l d’eau.
4 sachets ou cuillères à soupe de thé vert ou noir. Vous pouvez choisir du thé en sachet peu cher, j’ai découvert il y a peu de temps qu’en utilisant un thé que l’on apprécie permet d’obtenir un bien meilleur résultat. Les possibilités sont bien entendu sans limites dans le choix du type de thé.
1 grosse tasse de sucre blanc.
une mère de kombucha (le scoby). Demandez à vos amis, s’ils ont une mère à donner. Comme elle se multiplie au cours du temps, il faut la démultipier et s’en séparer.
une grand casserole pour faire le thé.
un grand bocal en verre. Enlever le bouchon pour le remplacer par un torchon afin de permettre au kombucha respirer.
un entonnoir en plastique.
une passoire en plastique.
des bouteilles en verre avec un système de bouchon très solide. On peut recycler des bouteilles de kombucha, prendre des bouteilles de limonade. Quand le kombucha sera versé dans les bouteilles, si le bouchon ne tient pas solidement, le processus de fermentation continue et fera sauter le bouchon.
Recette.
faire bouillir 3.5 l d’eau dans la casserole.
verser le sucre et bien remuer pour le dissoudre.
faire le thé.
laisser refroidir le thé à la température de la pièce.
mettre la mère dans le grand bocal.
quand le thé est à température ambiante, le verser dans le bocal et verser avec un torchon , j’utilise un élastique pour la fermeture.
laisser dans un endroit à l’abri de la lumière pendant 2 semaines.
After two weeks:
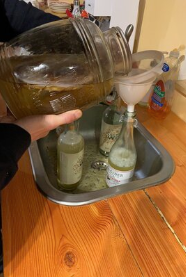
pour the kombucha in the glass bottles, using a strainer to avoid small parts of the scoby to go in the bottle. It’s basically to avoid your bottles to become potential little (but very DANGEROUS) bombs –remember the warning at the beginning of the article.
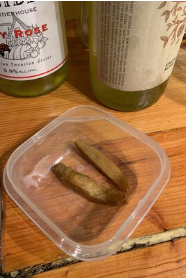
You can add ginger (I reuse the ginger over and over) or other fruits to give a specific taste, again endless possibilities here.
Make sure the bottle are well closed.
Set aside for a week before being able to drink it.
Après 2 semaines:
verser le kombucha dans les bouteilles en verre, en utilisant une passoire pour éviter que les petites parties de la mère aillent dans les bouteilles. Cette précautions vous permettra d’éviter que vos bouteilles ne deviennent des petites (mais très DANGEREUSES) bombes en attente – petit rappel de la mise en garde du début de l’article.
Vous pouvez ajouter du gingembre (que je réutilise d’une fois sur l’autre) ou tout autre fruit pour pimenter le goût.
Assurez-vous que les bouteilles soient bien fermées.
Laissez reposer pendant une semaine avant de pouvoir boire.
LAST WARNING…
Last but not least, when you open your ready to drink bottle, if you hear and see lots of bumbles coming near the opening, hold the lid and let the extra pressure out.
Yes home made kombucha is an adventure, but very worth it, I’ve been doing it for the last 4 years and can report no more exploded bottles or kitchen walls damaged!
DERNIERE RECOMMANDATION…
Enfin, quand vous ouvrirez une bouteille, si vous entendez ou voyez des bulles se former, laissez un peu d’espace en tenant le bouchon afin de faire évacuer le trop plein de pression.
Faire son propre kombucha est une aventure, mais tellement gratifiante, je m’y suis lancé depuis 4 ans et n’ai plus à me soucier de bouteilles explosées ou de murs de cuisines maculés.


